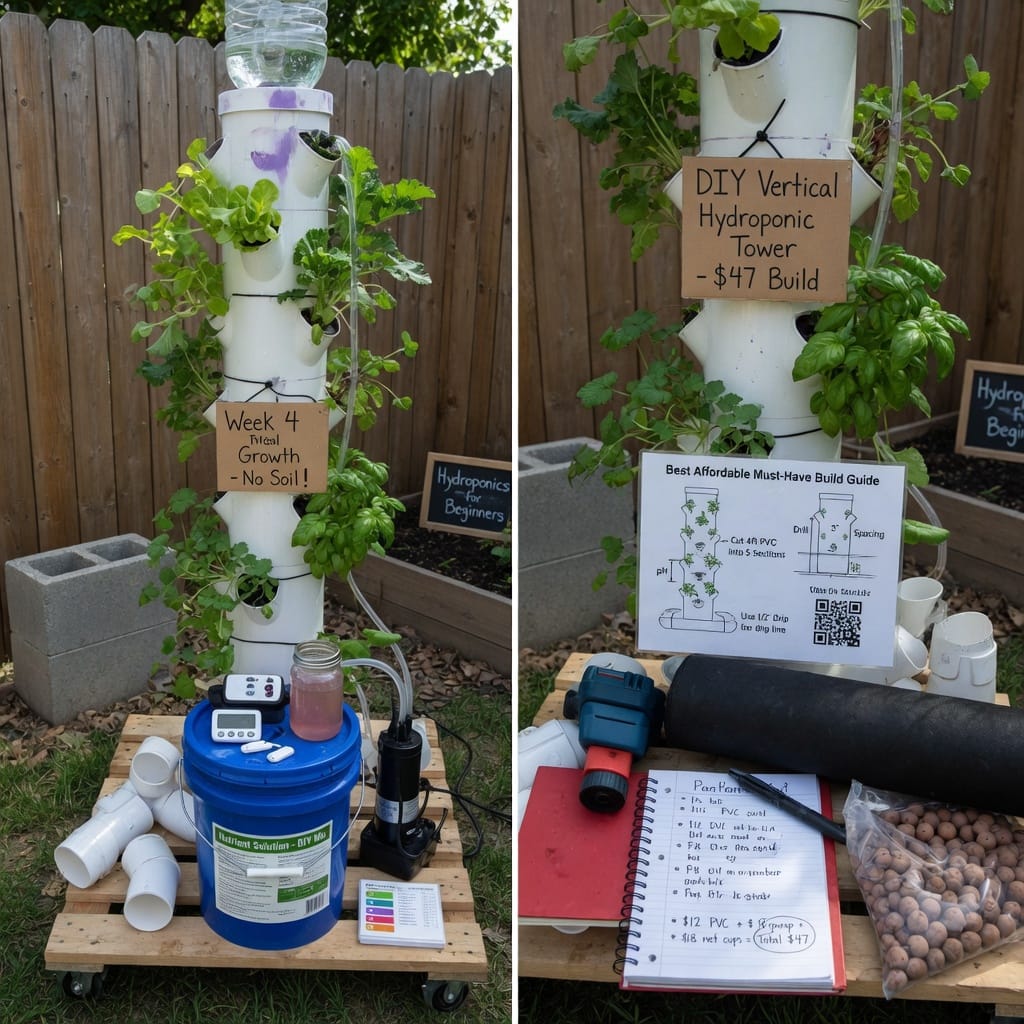
How to Build a DIY Vertical Hydroponic Tower on a Budget (Step-by-Step with Materials List)
Building your own system lets you grow fresh greens without spending hundreds on pre-made units. A well-planned DIY vertical hydroponic tower fits small balconies, patios, or even indoor corners while keeping costs low. This guide shows exactly how to build a DIY vertical hydroponic tower on a budget using everyday hardware store items and a few online purchases.
Many people start hydroponics because they want pesticide-free produce year-round. Vertical towers multiply your growing space without needing a large yard. The design uses stacked pipes or containers so roots stay bathed in nutrient solution while leaves get plenty of light.
Why This Project Makes Sense
Traditional gardening needs soil, constant weeding, and lots of room. A vertical hydroponic setup skips the dirt, cuts water use by up to 90 percent, and produces harvests in weeks. On a budget, you can complete the whole project for under $150 if you shop smart and reuse a few items you already own.
Materials You Will Need
Gather these supplies before you begin:
– 4-inch PVC pipe, about 6 feet long
– 4-inch end caps or elbows
– Submersible water pump rated at least 200 gallons per hour
– Airline tubing and a small air stone
– Net pots sized to fit your pipe holes
– Rockwool cubes or clay pebbles for growing medium
– pH testing kit and hydroponic nutrients
– Drill with hole saw attachment
– Measuring tape, marker, and hacksaw
A good submersible pump keeps the solution moving without clogging. One option available on Amazon is the Acquaer 115V Submersible Water Pump. For growing medium containers, many growers like the VIETNHI 2-Inch Net Pots. Full-spectrum lighting becomes essential indoors—check out the Roleadro 600W LED Grow Light.
Planning Your Tower Layout
Measure the space where the tower will stand. Keep it within reach so you can check water levels daily. Leave at least two feet of clearance above the top for easy planting and harvesting. Decide whether the tower will sit on a base tray or hang from a sturdy wall bracket.
Step 1: Cut and Prepare the Pipe
Mark the PVC at even intervals—usually every 8 to 10 inches. Use the hacksaw to create straight cuts if you need multiple shorter sections. Smooth any rough edges with sandpaper so roots do not snag later.
Step 2: Drill Planting Holes
Clamp the pipe securely. Use the hole saw to cut 2-inch openings along one side only. Space holes in a spiral pattern so each plant receives light. Clean out plastic shavings after every hole to avoid blocking water flow.
Step 3: Install the Reservoir and Pump
Place the bottom end cap on your reservoir container. Drop the pump inside and run the airline tubing up through the pipe. Connect the air stone near the bottom to keep oxygen levels high. If you want extra stability, secure the pipe to the reservoir with zip ties.
Step 4: Add Growing Medium and Plants
Fill each net pot with pre-soaked clay pebbles or rockwool. Start seedlings in a separate tray until they show two true leaves. Once roots appear, gently place them into the net pots. Lower the pots into the drilled holes so roots hang inside the pipe.
Step 5: Mix Nutrients and Test the System
Fill the reservoir with clean water. Add nutrients according to the label, then check pH. Most leafy greens prefer a range between 5.5 and 6.5. Run the pump for 15 minutes and watch the flow. Adjust the airline valve if you notice dry spots near the top.
Daily and Weekly Care
Check the water level every morning. Top off with pH-balanced water as needed. Change the full nutrient solution every seven to ten days to prevent salt buildup. Watch for algae on the pipe exterior—covering the tower with dark fabric helps block light.
Common Mistakes to Avoid
Using too strong a pump can create standing water instead of a gentle drip. Drilling holes too close together crowds roots and lowers yields. Skipping the pH test often leads to nutrient lockout, so keep the testing kit handy.
If you already have basic plumbing skills, the whole build takes one afternoon. Beginners may want an extra hour to double-check connections. Once the tower runs smoothly, you can expand by adding another pipe section later.
Scaling Up on a Budget
After your first harvest, consider adding a timer for the pump. This small upgrade prevents overwatering and saves electricity. Many growers also add a second tower beside the first using the same reservoir, doubling output without doubling the pump cost.
For more beginner tips on choosing the right location and lighting, see this helpful post on verticalhydrotower.com. You can also read research-backed growing guidelines from the University of Minnesota Extension at extension.umn.edu.
Start simple, watch how your plants respond, and adjust spacing or nutrient strength on the next cycle. Before long you will have a reliable source of fresh salad greens growing right outside your door or in a sunny window.