Picture this: a towering garden in your backyard or even your apartment balcony, bursting with fresh lettuce, herbs, and strawberries, all growing without a single shovelful of soil. Sounds like a futurist’s dream, right? But it’s totally achievable when you learn how to build your own vertical hydroponic system. This isn’t just any garden—it’s a space-saving powerhouse that uses water, nutrients, and a bit of ingenuity to produce food faster and more efficiently than traditional methods.
If you’ve been scrolling through Pinterest or YouTube, eyeing those sleek vertical towers but balking at the price tag, you’re in luck. This definitive guide—the most detailed one you’ll find online—will walk you through every step, from gathering materials to harvesting your first crop. Whether you’re a complete beginner or a DIY enthusiast looking to upgrade, building your own vertical hydroponic system at home can save you hundreds while giving you total control over your grow. Let’s break it down and get you started on this rewarding project.
Vertical hydroponics is revolutionizing home gardening, especially in urban areas where space is tight. By stacking plants upwards, you maximize output in minimal footprints—think 50+ plants in just a few square feet. Learning how to build your own vertical hydroponic system means tapping into this efficiency. Unlike horizontal setups, vertical ones use gravity for nutrient flow, reducing pump needs and energy costs.
Plus, they’re visually stunning, turning walls or corners into living art. The best part? You can customize it for indoors or outdoors, tailoring to your climate or available light. In places like San Francisco with mild weather, these systems thrive on patios, providing year-round fresh produce. If sustainability motivates you, vertical hydroponics cuts water use by 90% and eliminates soil erosion. Ready to dive into why this is the way to go?
Why bother with how to build your own vertical hydroponic system when kits exist? Simple: customization, cost savings, and the satisfaction of a hands-on creation. Pre-made towers can cost $300-500, but a DIY vertical hydroponic tower might run you $50-150, depending on scale. You’ll learn the ins and outs, making troubleshooting a breeze later.
Vertical designs are ideal for small spaces—apartments, balconies, or garages—yielding more per square foot than flat beds. Plants grow 30-50% faster thanks to direct nutrient delivery, and pests are easier to manage without soil. For families, it’s an educational tool; kids love watching roots in clear tubes. Environmentally, it’s a win: less waste, no pesticides if you go organic. As you master how to build your own vertical hydroponic system, you’ll appreciate the flexibility—add levels as you expand.
Not all vertical hydroponic systems are the same. When planning how to build your own vertical hydroponic system, pick a design that matches your skill and space. Popular options include:
Towers use stacked pots or PVC pipes with holes for plants. Nutrient solution trickles down from the top. Pros: Easy to build, great for beginners. Cons: Needs a pump for recirculation. Ideal for 20-50 plants.
Panels hang on walls with channels for nutrient flow. Perfect for indoor how to build your own vertical hydroponic system projects. Pros: Aesthetic, low footprint. Cons: Requires sturdy mounting.
These angle for better light exposure. When building your own vertical hydroponic system like this, use wood or metal frames. Pros: Maximizes sunlight. Cons: More complex assembly.
Using PVC for columns is the go-to for DIY vertical hydroponic towers. Cheap, durable, and customizable. We’ll focus on this for our main tutorial.
Consider your goals—leafy greens? Go tower. Fruits? Add support in your build.
Gathering supplies is the fun part of how to build your own vertical hydroponic system. Focus on quality to avoid leaks. For a basic 4-foot PVC tower holding 20 plants:
PVC pipe: 4-inch diameter, 4-6 feet long (FORMUFIT 4 Inch Schedule 40 PVC Pipe)
End caps and elbows: For sealing and connections
Net pots: 2-3 inch for plant holding (CZ Garden Supply 3 inch Net Pots)
Submersible pump: For nutrient circulation (VIVOSUN 800GPH Submersible Pump)
Reservoir: 20-gallon tub or bucket
Tubing: 1/2-inch vinyl for flow
Grow medium: Clay pebbles or rockwool
Nutrients: Balanced formula (General Hydroponics Flora Grow, Bloom, Micro Combo)
pH kit: For water balance (General Hydroponics pH Control Kit)
Drill and hole saw: 2-3 inch bit for plant holes
Support frame: Wood or metal stand
Optional: Grow lights if indoors (Spider Farmer SF1000 LED Grow Light)
Total cost: Around $100-200. These products are selected for their reliability in DIY vertical hydroponic tower builds—easy to source and integrate.
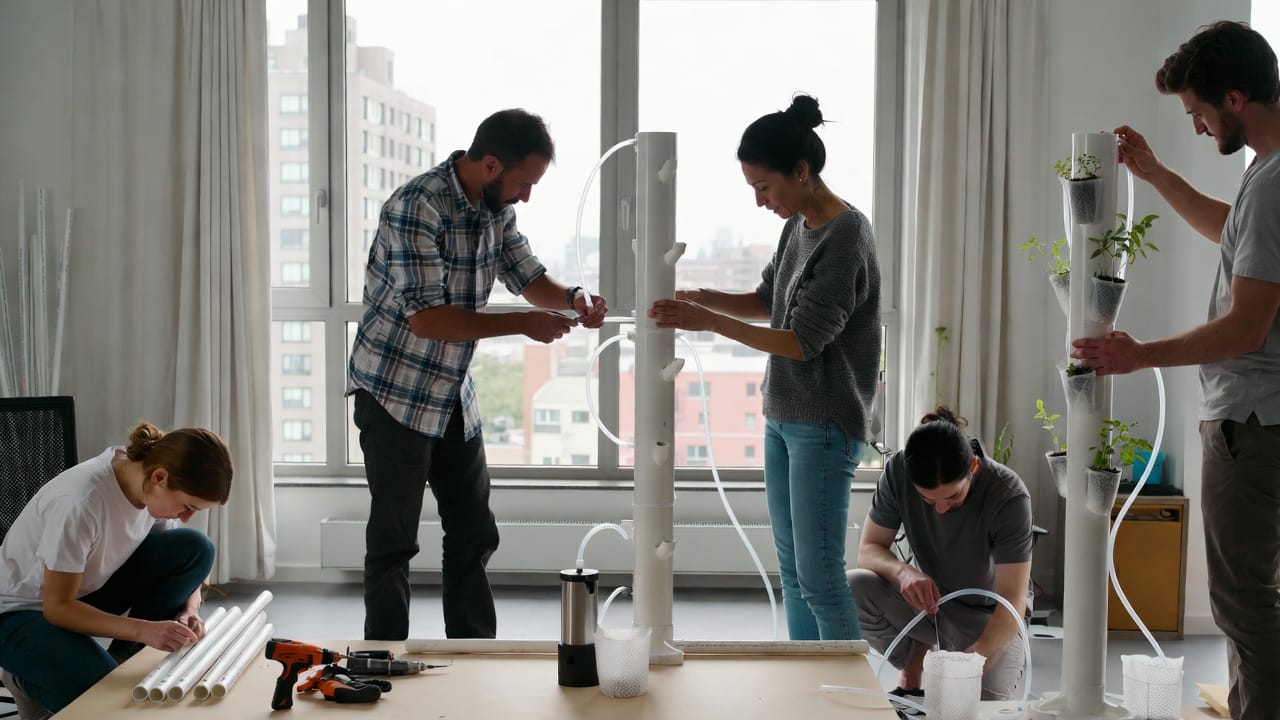
Time to get building! This guide for how to build your own vertical hydroponic system focuses on a single PVC tower—expand to multiples later.
Decide height (4-8 feet) and plant count (holes every 8-12 inches). Sketch for even spacing. In building your own vertical hydroponic system, consider light—taller towers need rotation or supplemental LEDs.
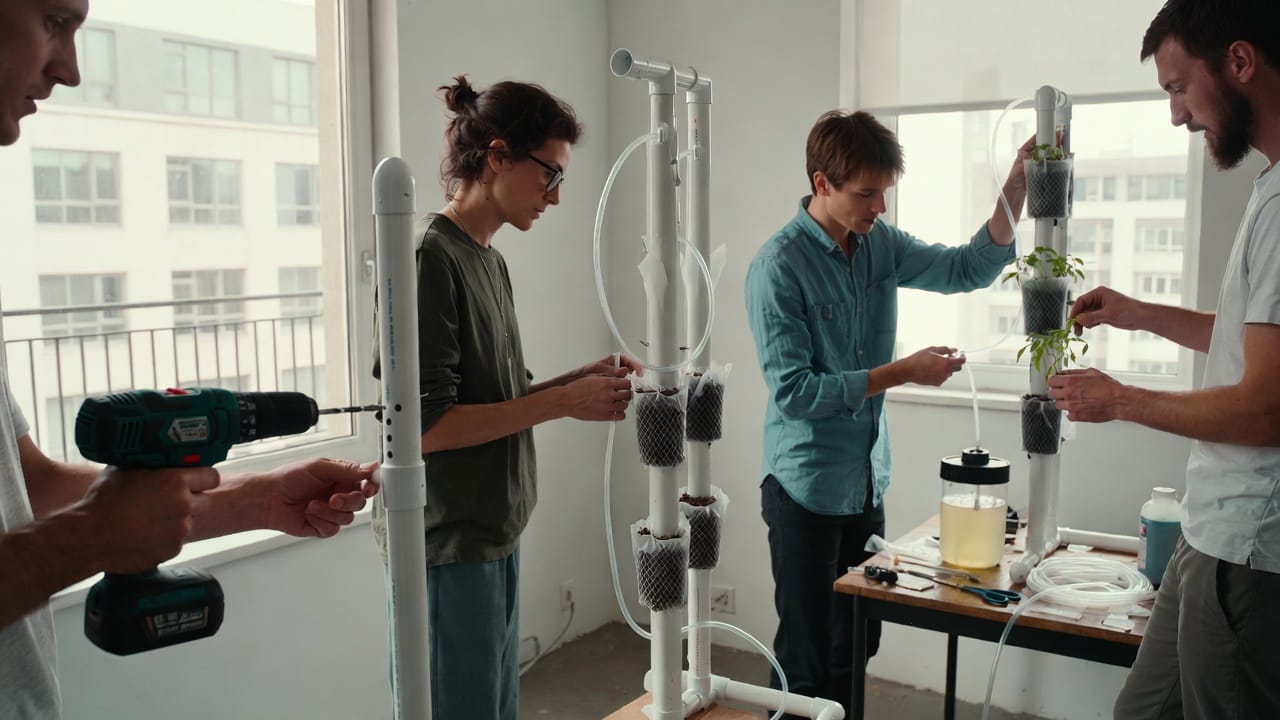
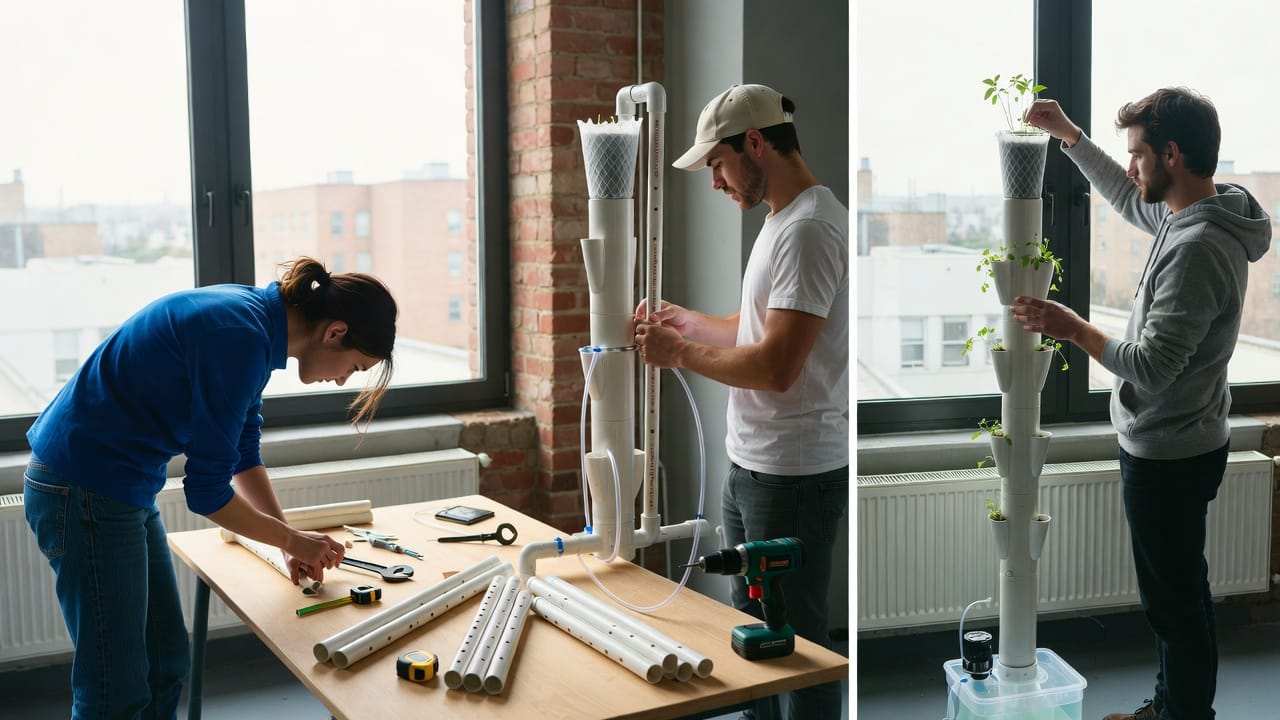
Cut pipe to length. Mark hole locations—stagger for light. Use hole saw to cut 2-3 inch openings. Sand edges smooth. This is core to your DIY vertical hydroponic tower.
Cap bottom of pipe, drill small drainage holes if non-recirculating. Place in reservoir. For recirculation, connect tubing from pump to top. Secure tower upright with frame—stability is key in how to build your own vertical hydroponic system.
Submerge pump in reservoir, run tubing up pipe (drill entry hole). At top, add sprinkler or drip ring for even flow. Test for leaks—dry run water through your homemade vertical hydroponic setup.
Fill net pots with medium, insert into holes. Mix nutrients in reservoir (follow ratios for veg/fruit). Adjust pH to 5.5-6.5. Your system is primed!
Transplant seedlings—roots through nets into flow. Plug in pump (timer for 15 min on/off cycles). Monitor daily in the first week.
Voila! Your vertical hydroponic system is operational. For maintenance, read our Maintaining Your Hydroponic Garden.
Once basic, tweak how to build your own vertical hydroponic system for better performance. Add automation: Smart timers or sensors for pH/EC. Go multi-tower—connect four for a farm-like setup. Incorporate aquaponics with fish for natural nutrients. For indoors, integrate LEDs at each level. Experiment with angles for sun exposure. These upgrades make your build professional-grade.
Check Advanced Hydroponic Techniques for more ideas.
What to grow? In how to build your own vertical hydroponic system, select compact, fast-growers. Lettuce, spinach, basil, mint, strawberries excel. Avoid heavy fruits without support. Start with herbs for quick wins. Our Best Plants for Vertical Hydroponic Systems has detailed recs.
Issues happen. Clogged tubing? Clean weekly. Nutrient burn? Dilute solution. Algae? Light-proof reservoir. In building your own vertical hydroponic system, proactive checks prevent problems. Root rot? Boost aeration.
Start small, then expand. Add towers side-by-side or stack horizontally. Commercial vibes on a budget. Track costs—your DIY vertical hydroponic tower pays off in produce savings.
Go green: Use rainwater, solar pumps. Recycle plastics. Organic nutrients minimize impact. Building your own vertical hydroponic system promotes local food, cutting transport emissions.
Folks in apartments harvest salads weekly from balcony towers. Backyard builders feed families. YouTube tutorials abound, but this guide condenses it all. Your turn to create!
Building your own vertical hydroponic system opens doors to fresh, homegrown goodness. With patience and tweaks, it’ll become a staple. Experiment, enjoy the process, and savor those first bites from your creation. The garden of tomorrow is here—happy building!
© 2026 VerticalHydroTower.com • Sustainable Hydroponic Farming